Chapter 9: Meta Spatial Editor
Congratulations on completing the core IWSDK tutorial! While you can build entire WebXR experiences with code alone, Meta Spatial Editor provides a powerful visual tool that can dramatically accelerate your development workflow. In this bonus chapter, you'll learn how to combine visual scene composition with programmatic behavior.
What You'll Build
By the end of this chapter, you'll be able to:
- Set up Meta Spatial Editor for IWSDK integration
- Create and compose 3D scenes visually with drag-and-drop
- Add IWSDK components to objects directly in the editor
- Export scenes that automatically integrate with your IWSDK projects
- Use hot reload for instant feedback between editor and code
- Create custom components and use them in the visual editor
Why Meta Spatial Editor?
Meta Spatial Editor excels at tasks that are tedious or error-prone in code, while IWSDK's code-first approach handles logic and dynamic behavior perfectly. Together, they create a powerful hybrid workflow:
Meta Spatial Editor strengths:
- Visual scene layout: Position objects in 3D space with immediate feedback
- Component assignment: Add grabbable, physics, and UI components without coding
- Asset composition: Drag-and-drop 3D model placement and organization
- Designer collaboration: Non-programmers can contribute to scene creation
IWSDK code strengths:
- Custom interactions: Complex behaviors and game logic
- Dynamic content: Procedural generation and runtime changes
- Performance optimization: Fine-tuned systems and queries
- Integration: APIs, databases, and external services
The result is a workflow where designers handle spatial composition visually while developers focus on behavior and systems.
Prerequisites
Before starting, make sure you have:
- Completed Chapters 1-8 - You should have a working IWSDK project
- Node.js 20.19.0+ - For running the development server
- IWSDK project with Meta Spatial Editor integration - Created with
npm create @iwsdk@latestand chose "Yes" for Meta Spatial Editor integration
Project Setup Required
If your project wasn't created with Meta Spatial Editor support, you'll need to manually add the @iwsdk/vite-plugin-metaspatial plugin to your vite.config.ts. The easiest approach is to create a new project with the integration enabled.
Download Meta Spatial Editor
Download and install Meta Spatial Editor version 9 or higher:
Getting Started with Visual Scene Composition
Let's start by opening an existing Meta Spatial Editor project and understanding how it integrates with IWSDK.
Starting Your Development Server
First, ensure your IWSDK development server is running:
cd your-iwsdk-project  # Navigate to your project
npm run dev            # Start the development server
Keep this running throughout the tutorial - it's essential for hot reload functionality.
Opening Your First Spatial Project
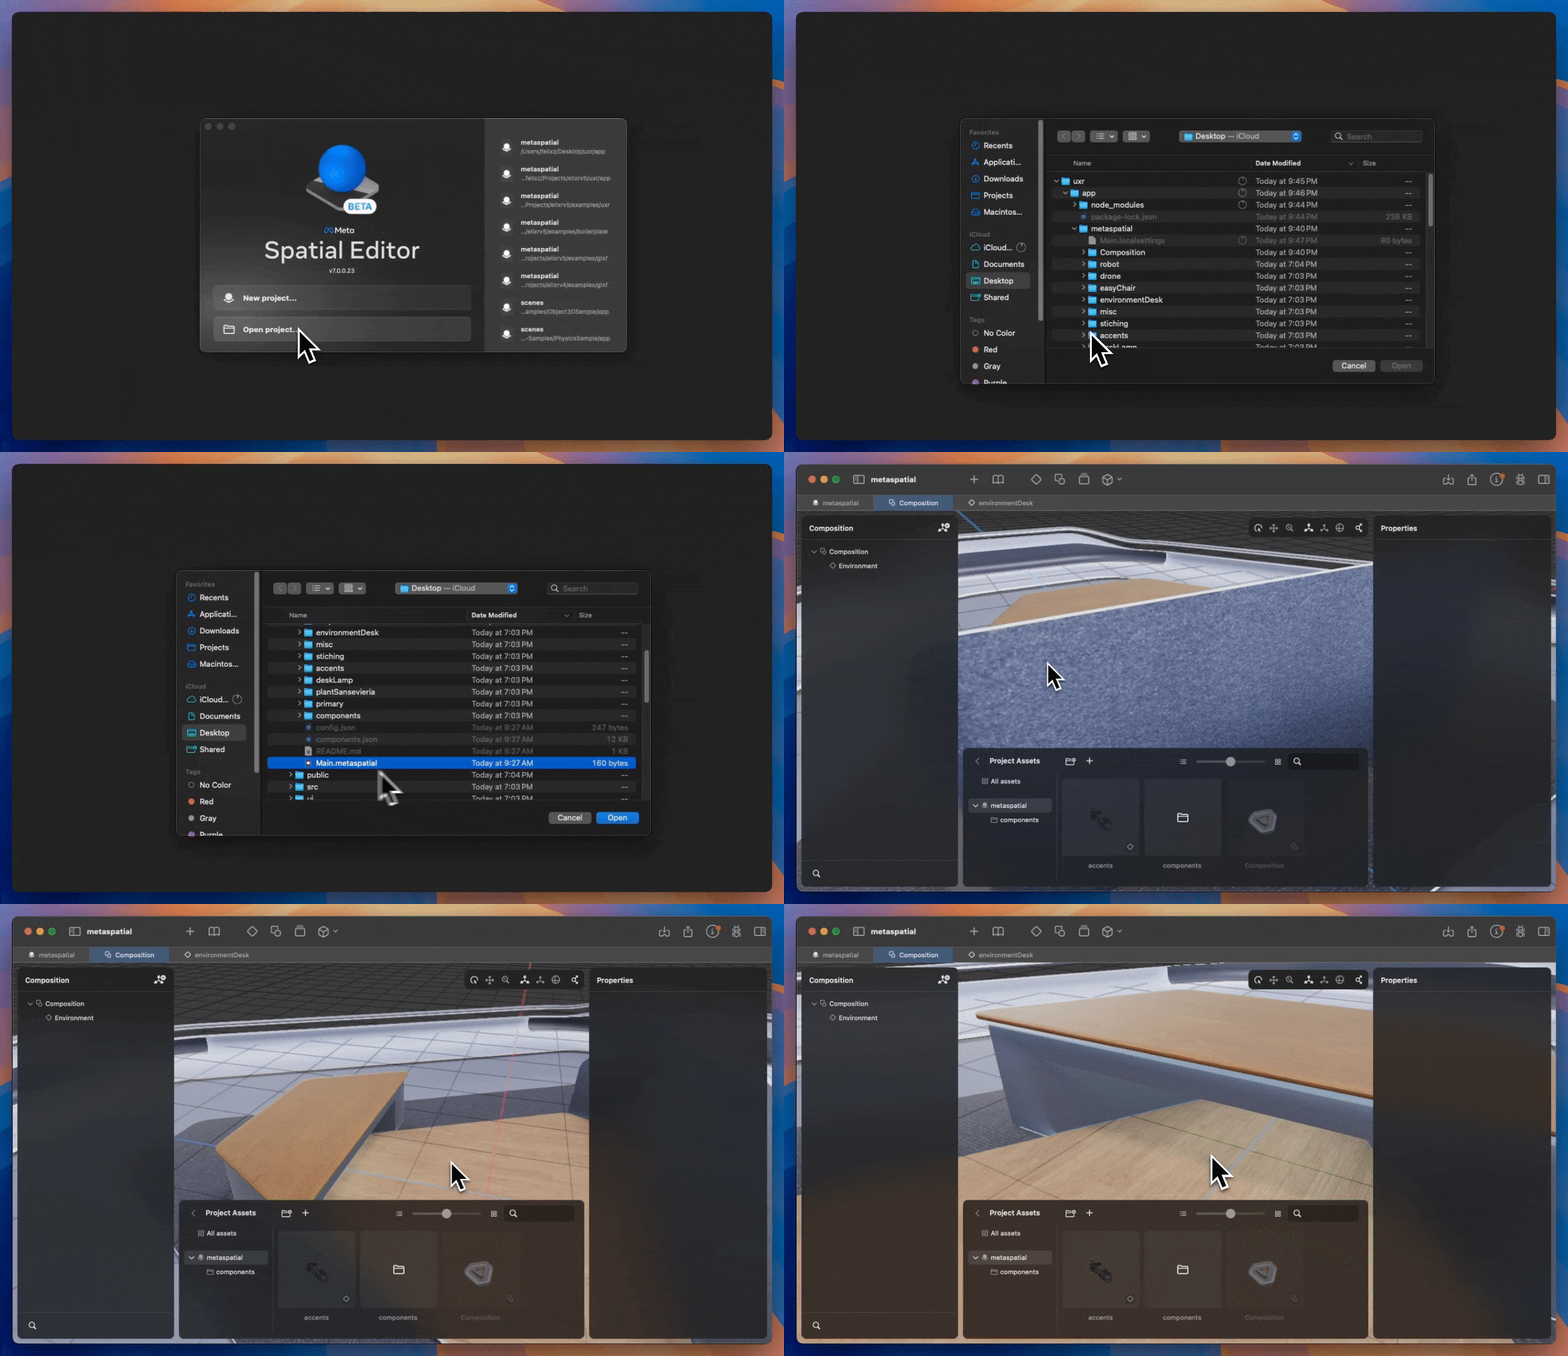
When you created your IWSDK project with Meta Spatial Editor integration, a metaspatial/ folder was automatically created with a starter project.
- Launch Meta Spatial Editor
- Open the
Main.metaspatialfile in your project'smetaspatial/directory - You should see a basic scene with some example objects
Understanding the Interface
The Meta Spatial Editor provides the essential tools for scene composition including a 3D viewport for editing, composition panel for organizing objects, properties panel for configuration, and asset library for available resources.
Basic Navigation
Learn these essential navigation controls:
- Left mouse + drag: Rotate camera around the scene
- Middle mouse + drag: Pan the camera view
- Mouse wheel: Zoom in/out
- W/A/S/D or arrow keys: Walk the viewport camera
- Left click: Select objects
Building Your First Scene
Let's create a simple interactive scene to understand the core workflow.
Adding Objects to Your Scene
You can add objects in several ways:
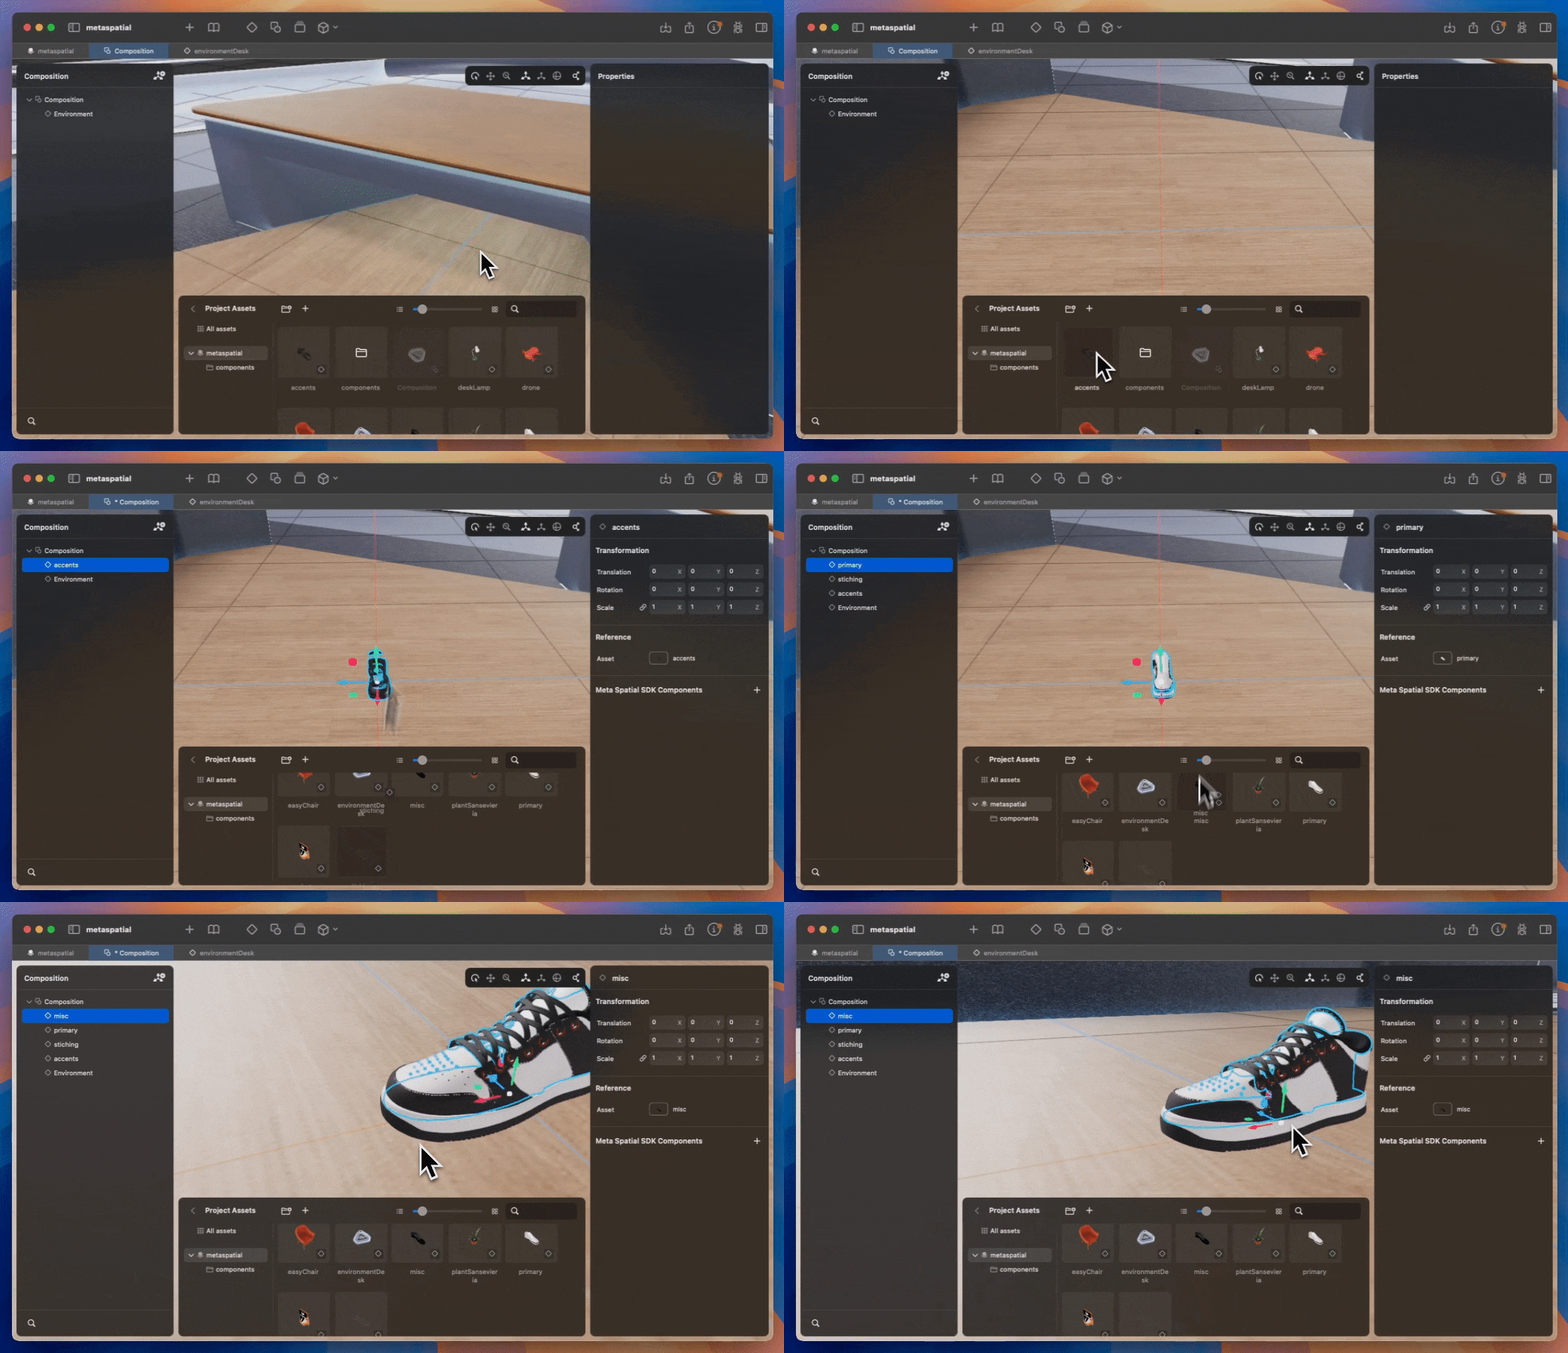
Method 1: Drag and drop assets
- From the Asset Library, drag a GLTF model directly into the 3D viewport
- The object appears both in the scene and in the Composition panel hierarchy
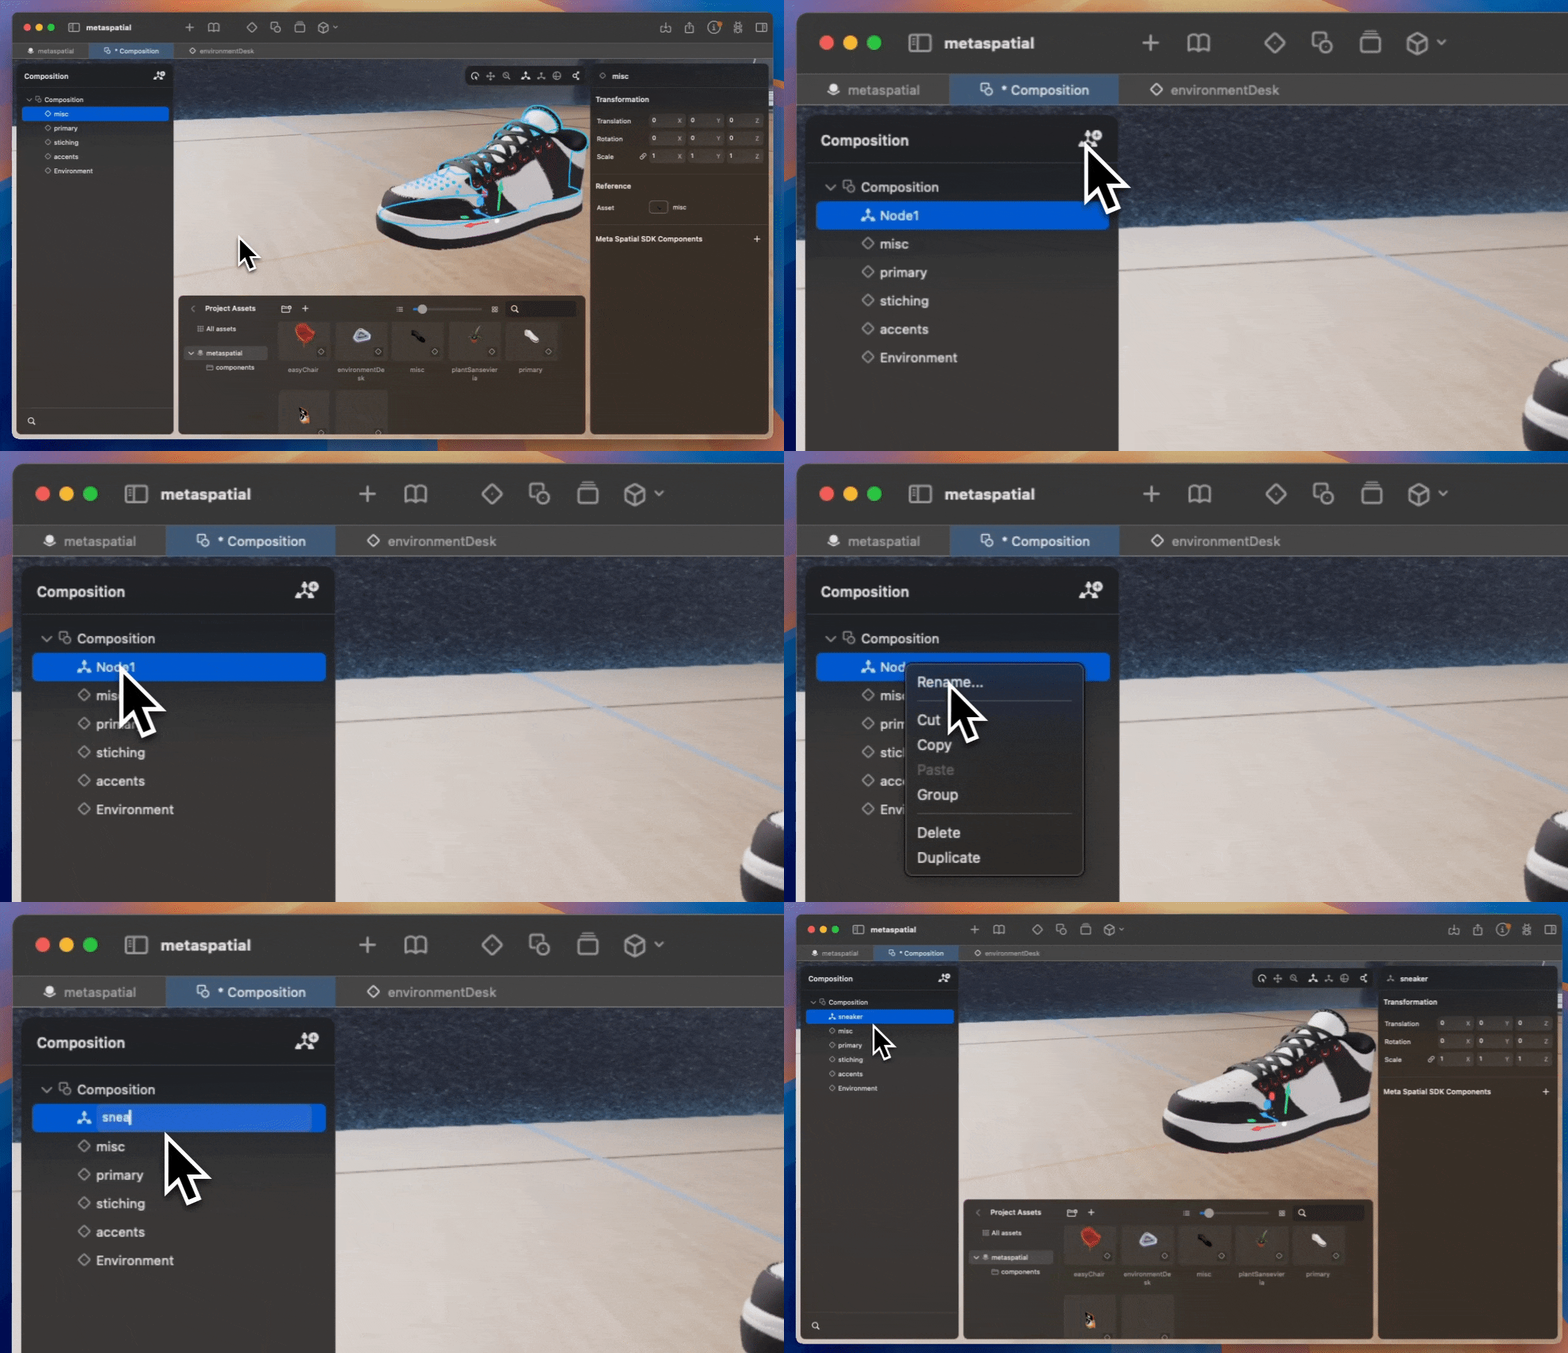
Method 2: Create empty nodes
- Click the gizmo + plus icon in the Composition panel
- This creates an empty node that can serve as a parent group for organizing objects
Organizing Scene Hierarchy
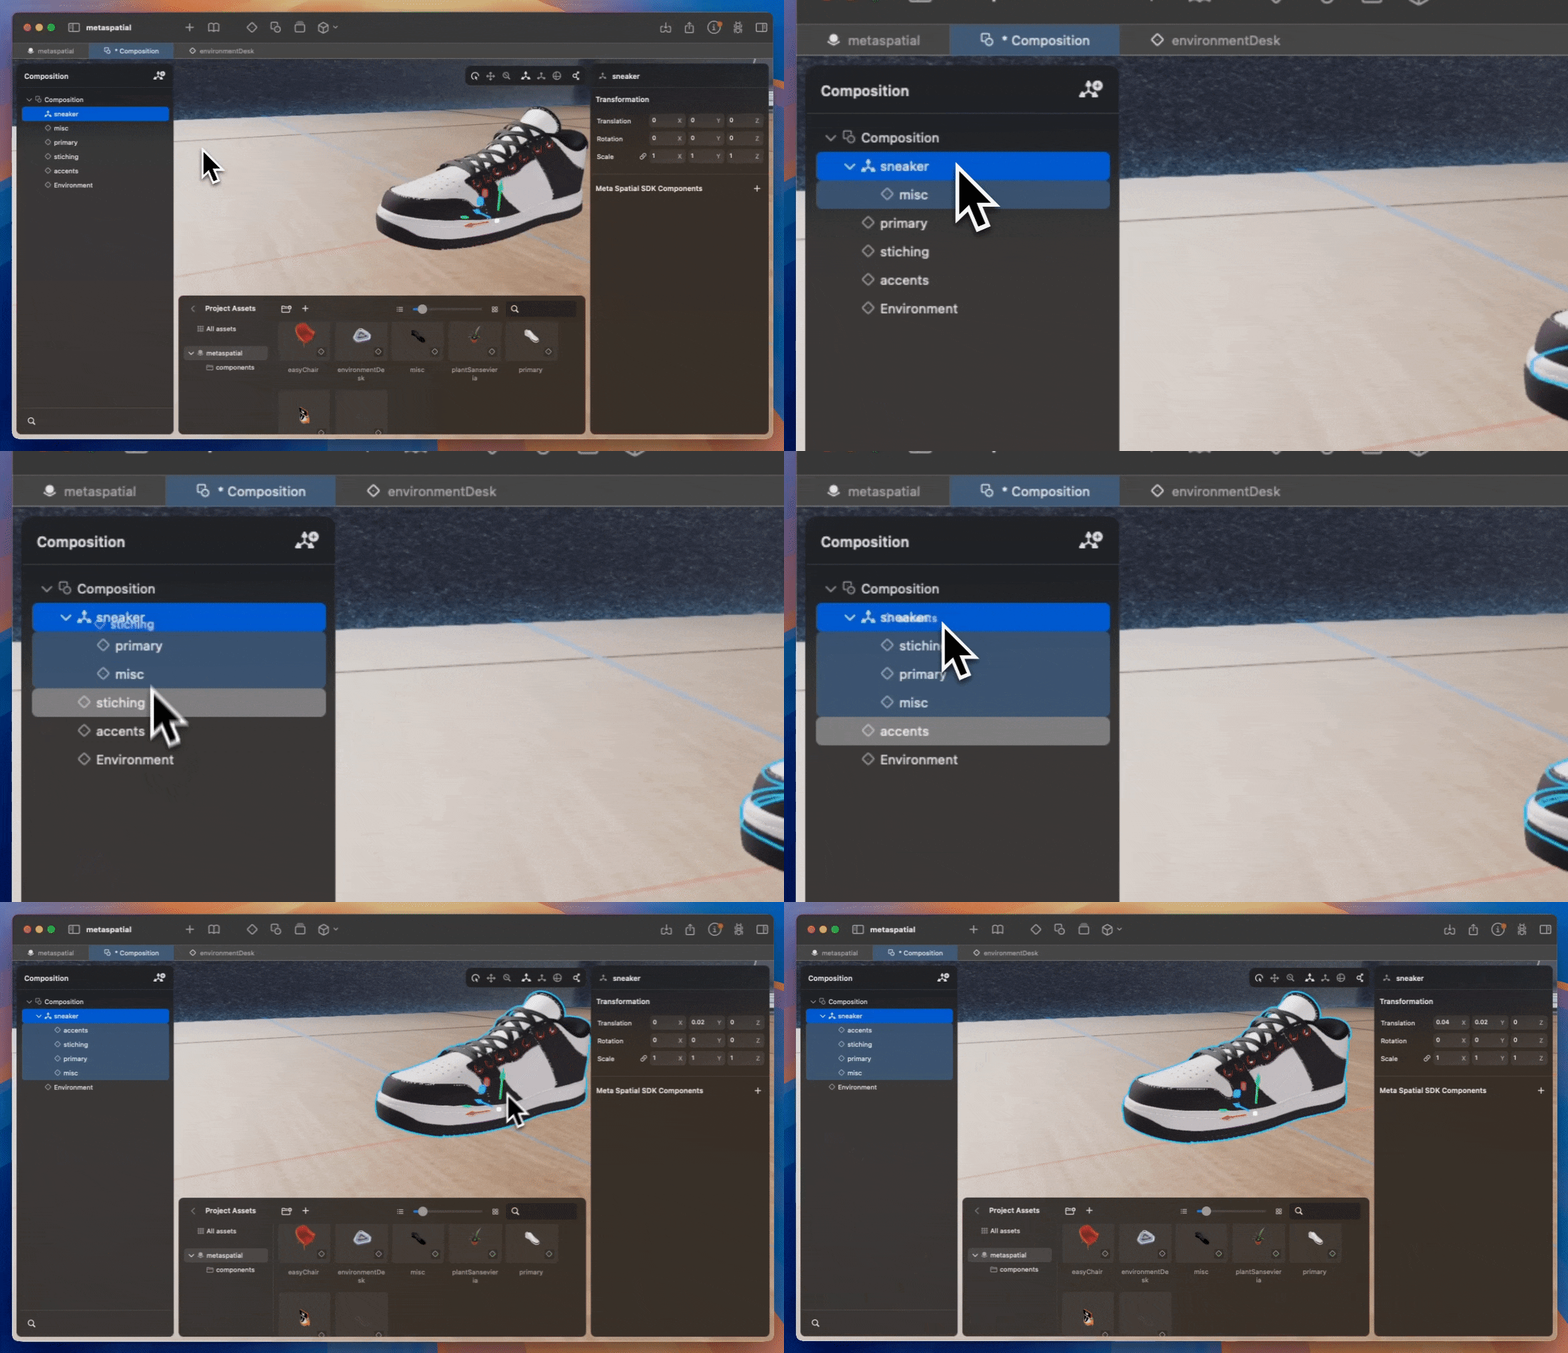
Good scene organization makes your project maintainable:
- Create parent groups for logical organization (e.g., "Furniture", "Lighting", "Interactive Objects")
- Drag child objects onto parent nodes in the Composition panel to establish relationships
- Name objects descriptively - this helps when writing code that references them
Positioning and Transforming Objects
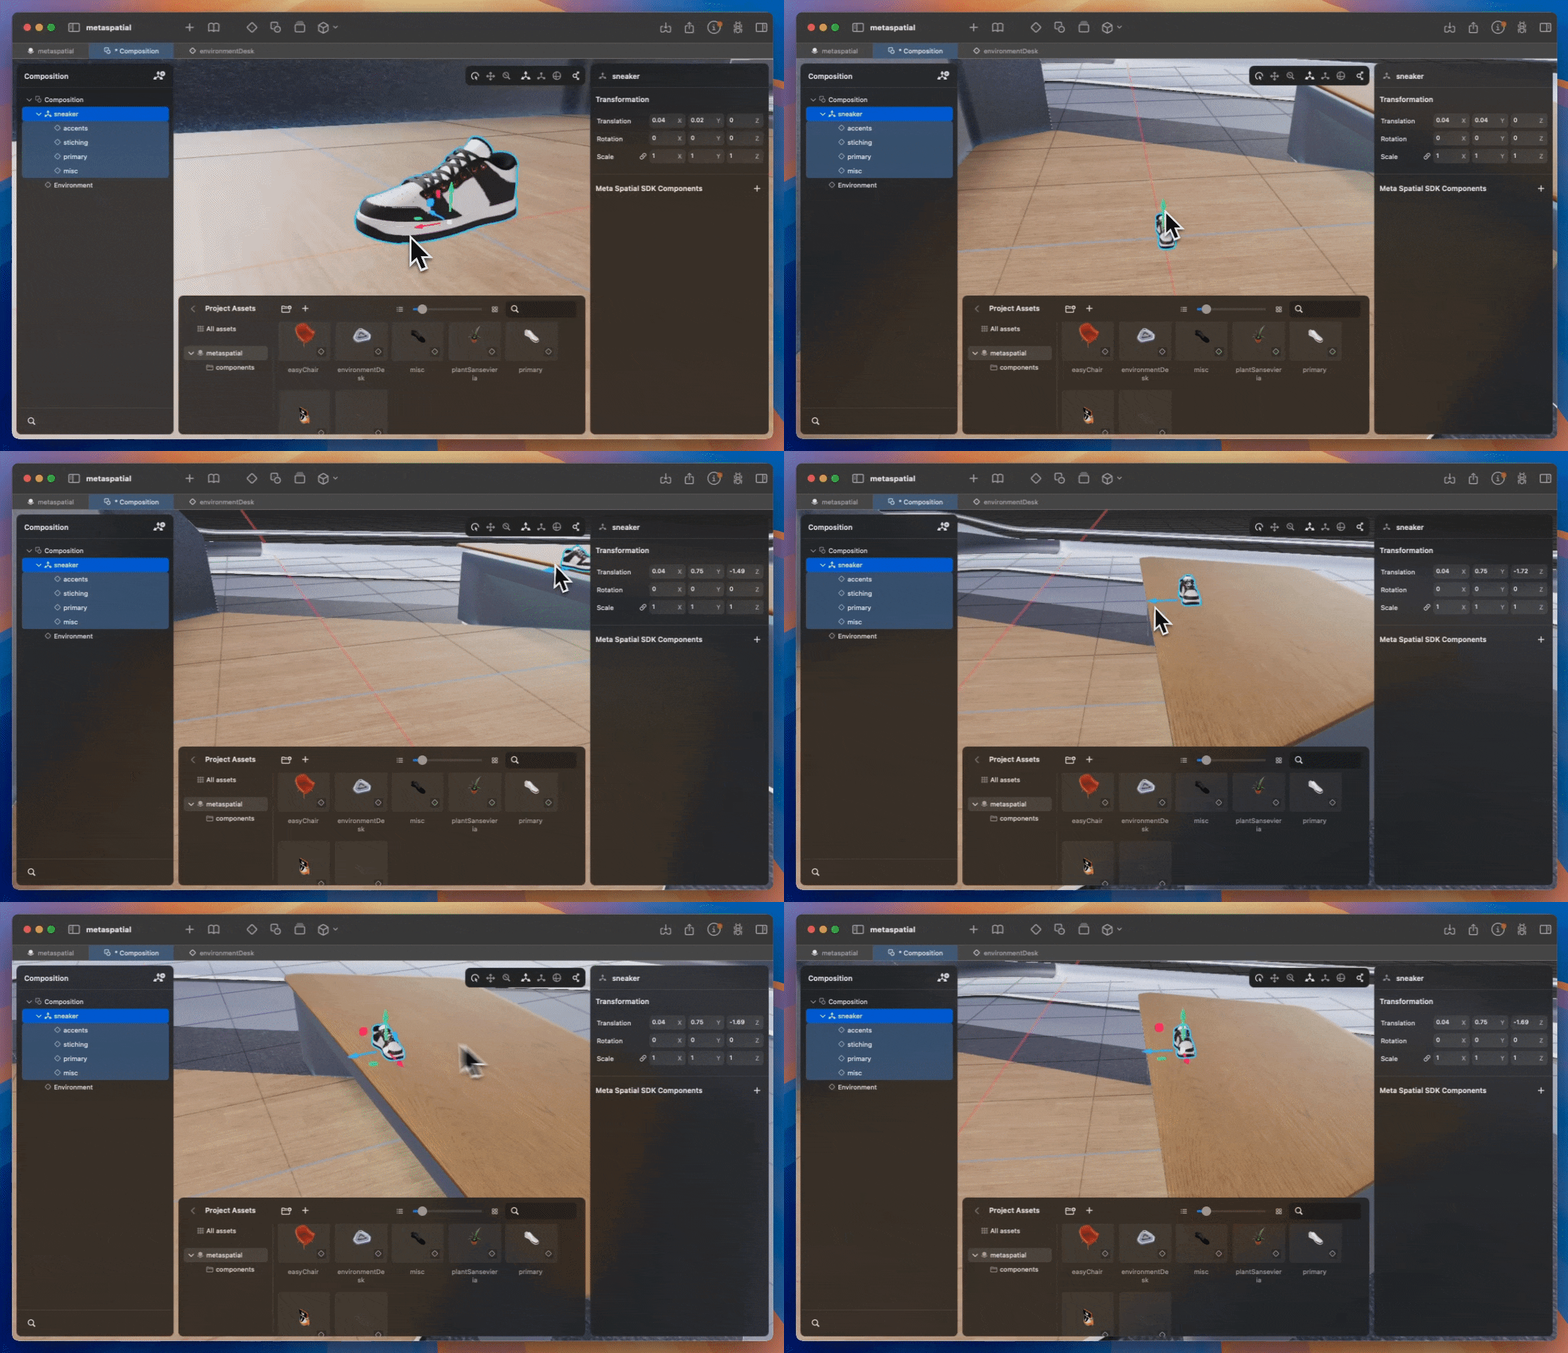
Use the visual gizmos to position objects precisely:
- Select an object in the viewport or Composition panel
- Use the visual gizmos to adjust transforms, materials, and other properties
Precision Controls
Hold Shift while dragging for finer control, or use the Properties panel to enter exact numeric values for transforms.
Adding IWSDK Components Visually
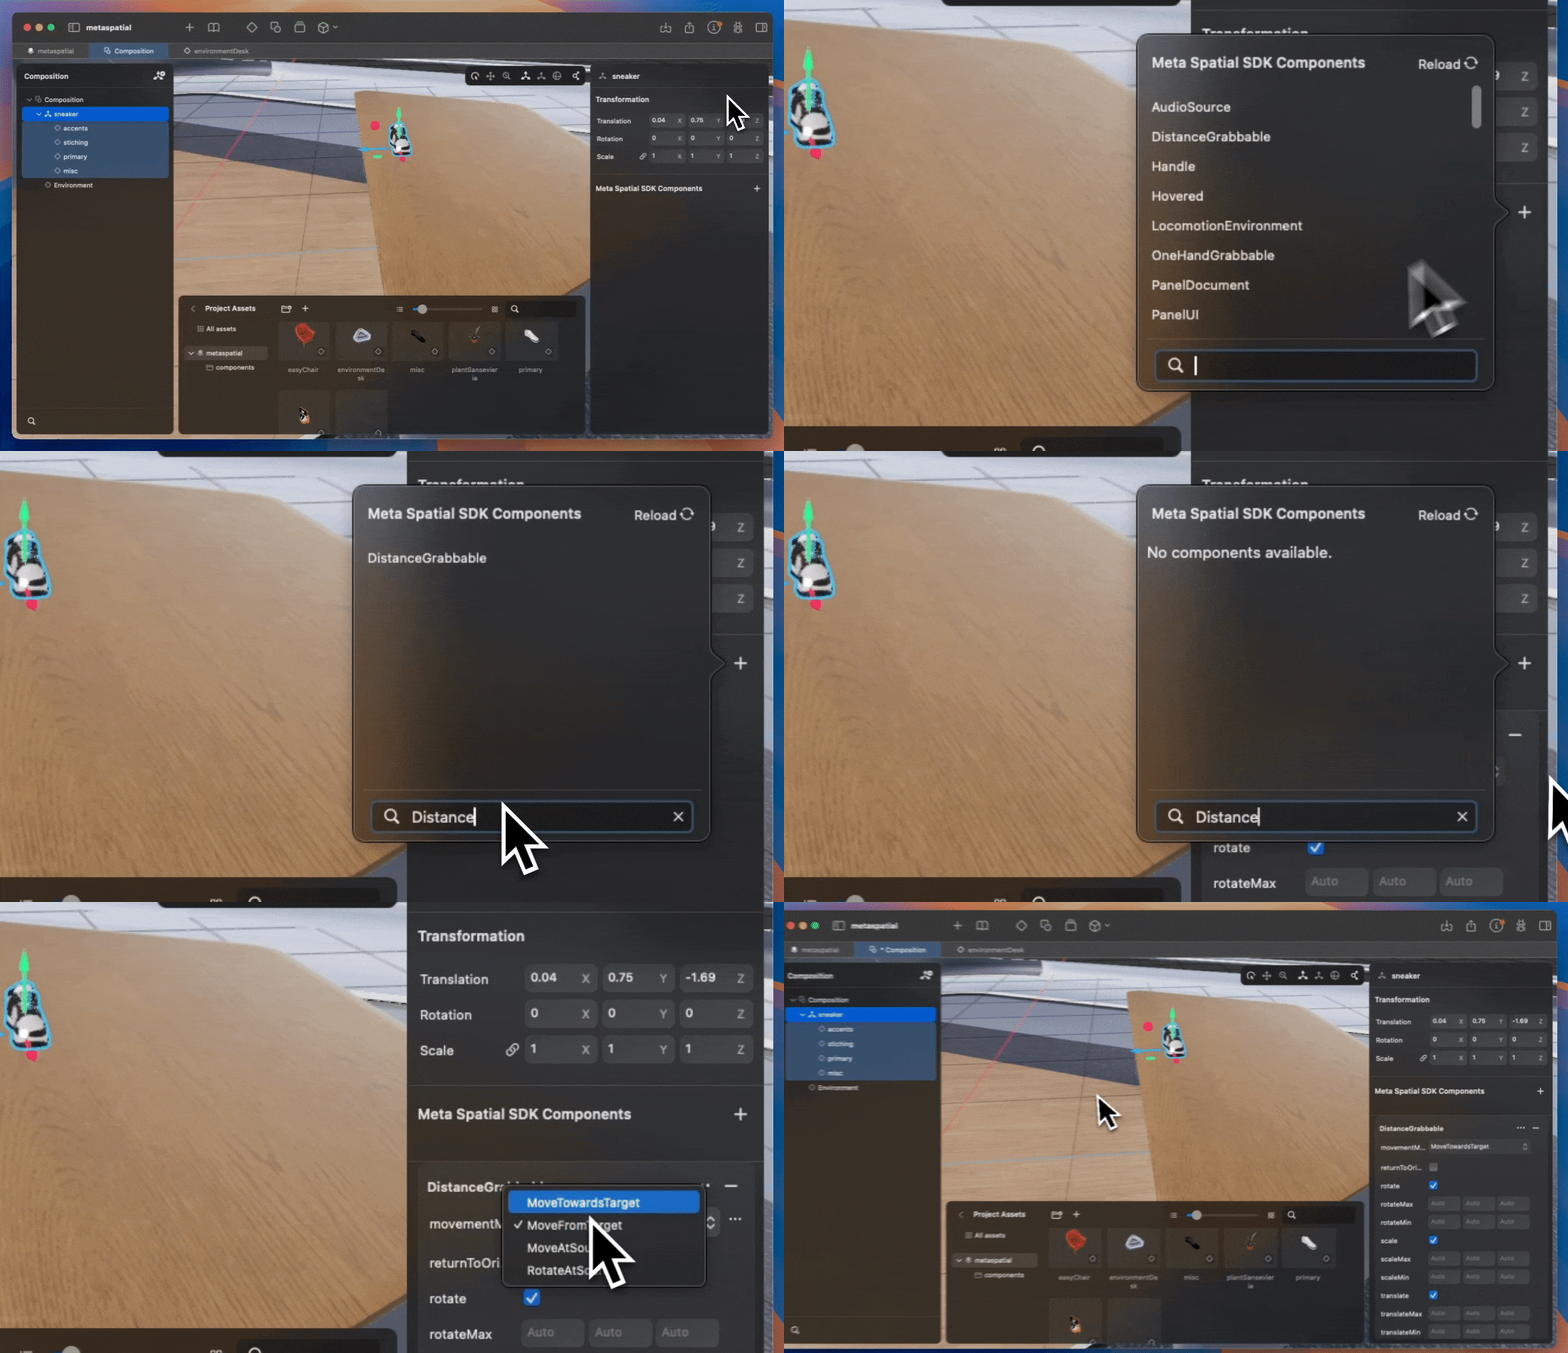
This is where Meta Spatial Editor really shines - you can add IWSDK components without writing any code:
- Select an object you want to make interactive
- In the Properties panel, find the "Immersive Web SDK Components" section
- Click the + button to add a component
- Choose a component like "Interactable" or "OneHandGrabbable"
- Configure properties in the component's settings
For grabbable objects, you need both components:
- Interactable: Makes the object respond to pointer events
- OneHandGrabbable or DistanceGrabbable: Defines grab behavior
Hot Reload Integration
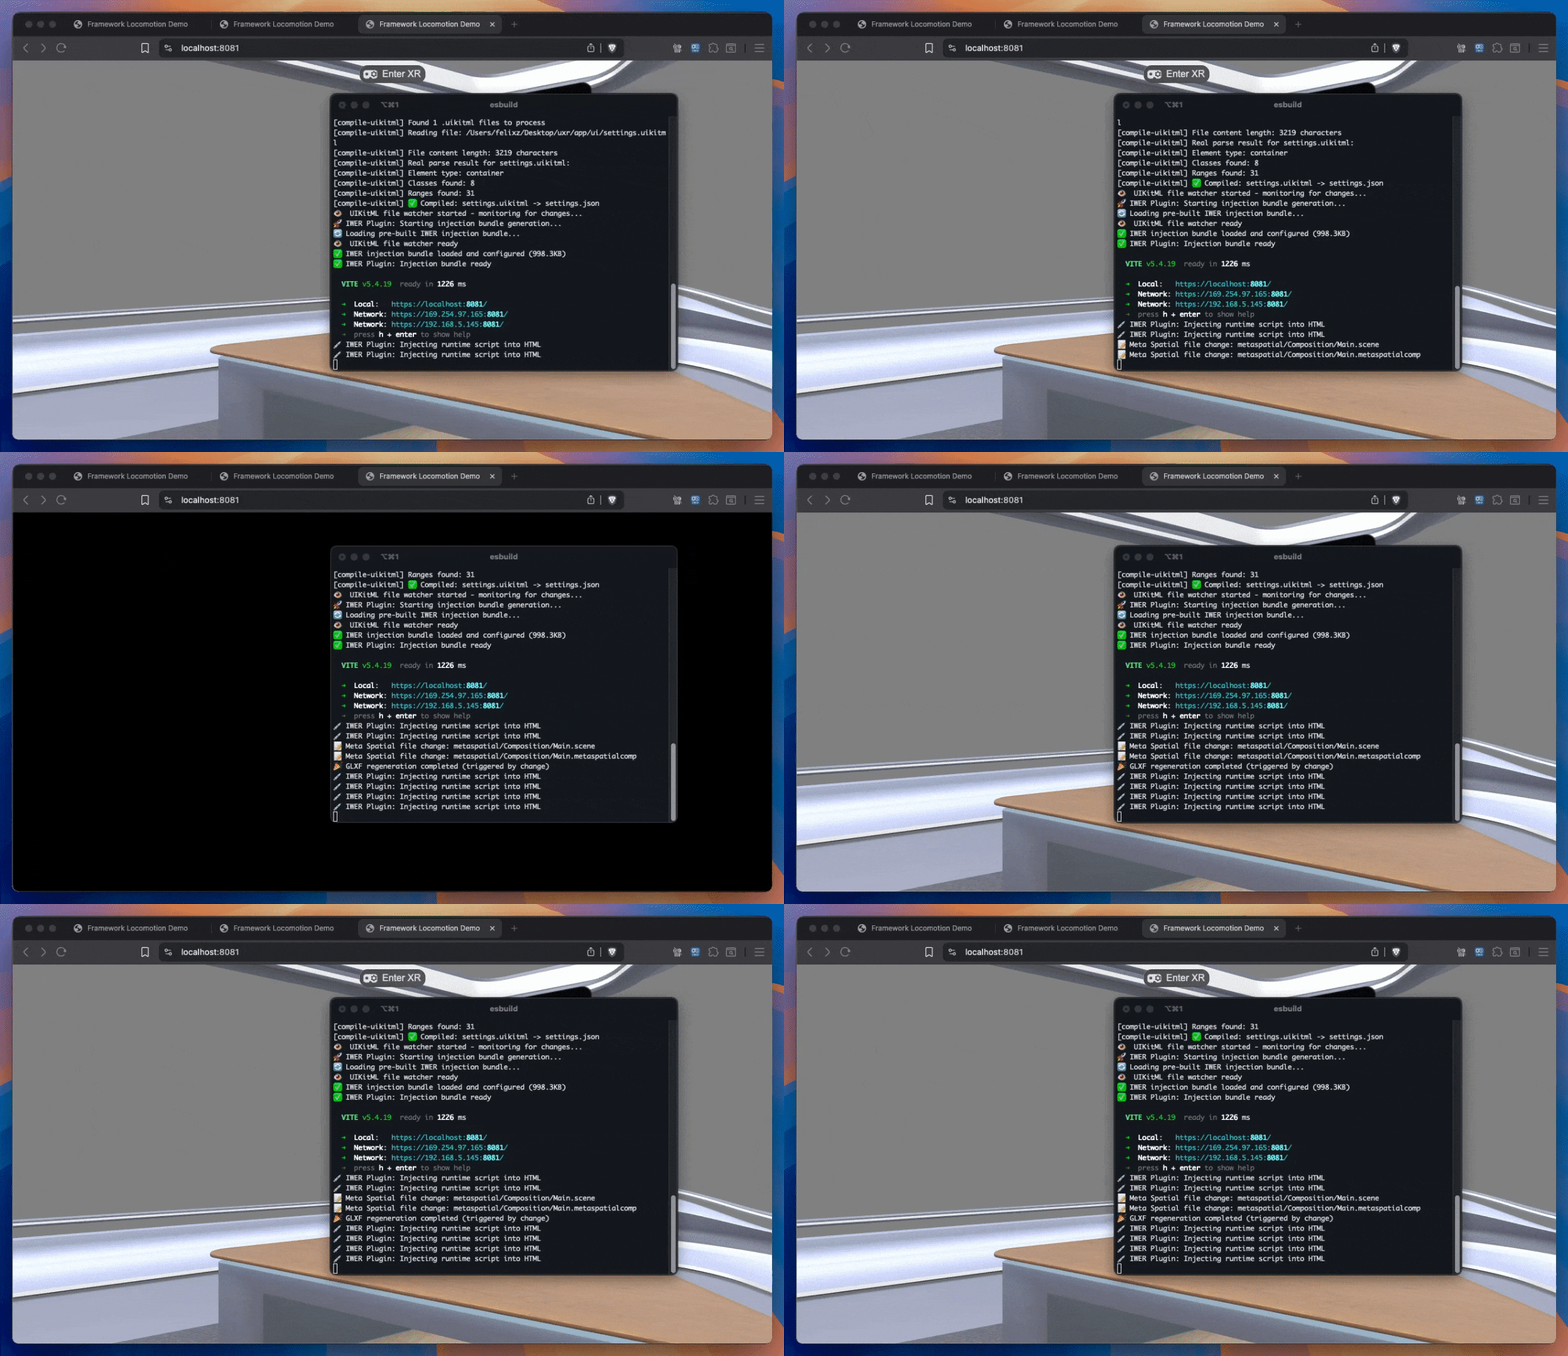
The real magic happens when you save your spatial project - your IWSDK app automatically updates.
How Hot Reload Works
- Meta Spatial Editor: Save your project (Cmd/Ctrl+S)
- Vite Plugin: Detects the change and regenerates GLXF export
- IWSDK Runtime: Automatically reloads the updated scene
- Your App: Updates instantly in browser or headset
Testing the Integration
Let's verify everything is working:
- Add a grabbable object in Meta Spatial Editor (follow the steps above)
- Save the project (Cmd/Ctrl+S)
- Check your IWSDK app (browser or headset) - the object should now be grabbable
- Try grabbing it with controllers or hand tracking
Keep Dev Server Running
Hot reload only works when your IWSDK development server is running. If you stop the server, you'll need to restart it to re-enable hot reload.
Creating Custom Components
While built-in components cover common use cases, you can create custom components for unique behaviors.
Step 1: Define Your Component in Code
Create a new file in your src/ directory (e.g., src/spinner.js):
import { createComponent, createSystem, Types } from '@iwsdk/core';

const AXES = {
  X: 'X',
  Y: 'Y',
  Z: 'Z',
};

export const Spinner = createComponent('Spinner', {
  speed: { type: Types.Float32, default: 1.0 },
  axis: { type: Types.Enum, enum: AXES, default: AXES.Y },
});

export class SpinSystem extends createSystem({
  spinner: { required: [Spinner] },
}) {
  update(delta) {
    this.queries.spinner.entities.forEach((entity) => {
      const speed = entity.getValue(Spinner, 'speed');
      const axis = entity.getValue(Spinner, 'axis');

      // Apply rotation based on axis and speed
      const rotationAmount = delta * speed;
      switch (axis) {
        case 'X':
          entity.object3D.rotateX(rotationAmount);
          break;
        case 'Y':
          entity.object3D.rotateY(rotationAmount);
          break;
        case 'Z':
          entity.object3D.rotateZ(rotationAmount);
          break;
      }
    });
  }
}
Step 2: Register Your System
In your main src/index.ts, import and register the system:
import { SpinSystem } from './spinner.js';

// After World.create()
World.create(/* ... */).then((world) => {
  // Register your custom system
  world.registerSystem(SpinSystem);

  // ... rest of your setup
});
Step 3: Use Component in Meta Spatial Editor
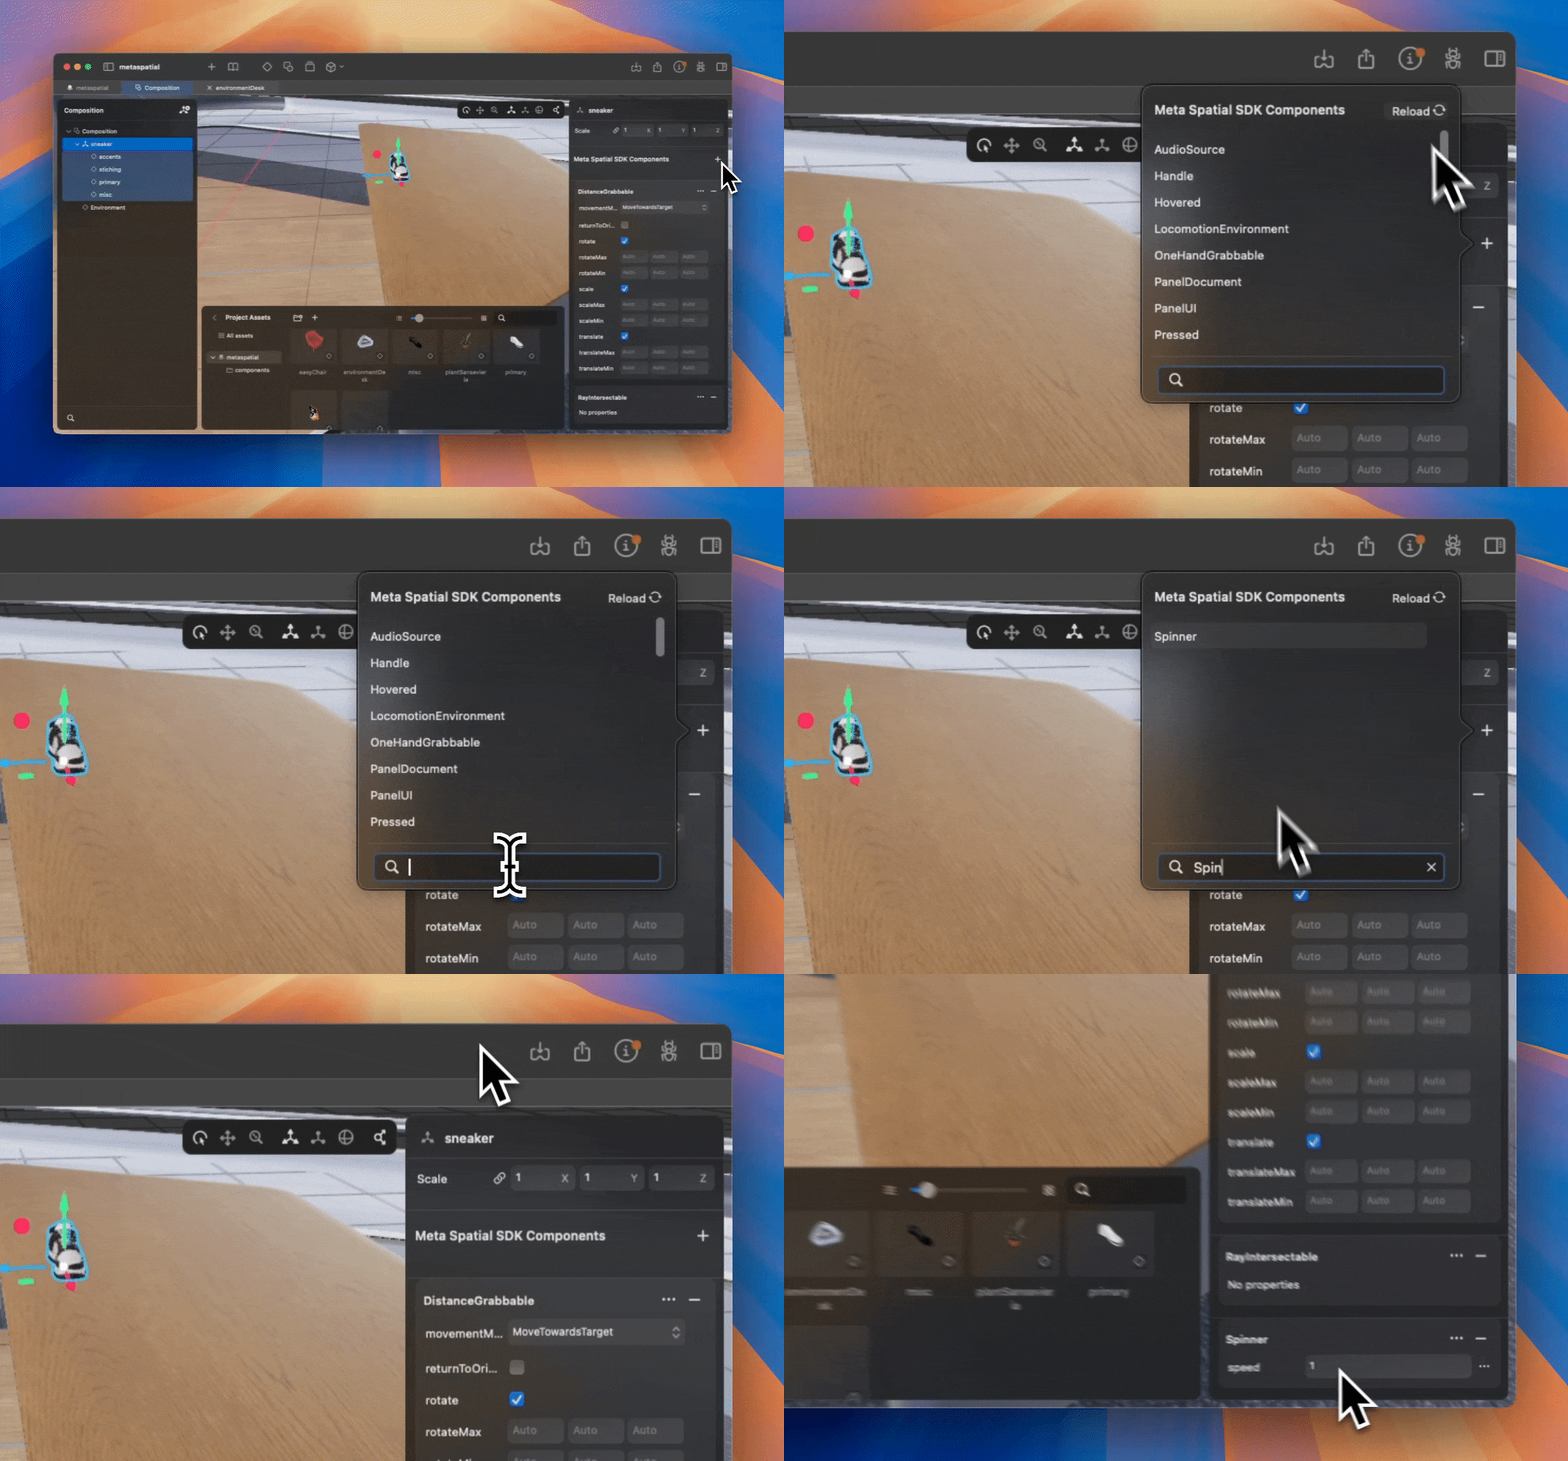
- Select an object you want to spin
- In the Properties panel, click + next to "Immersive Web SDK Components"
- Click the "Reload" button in the component dropdown to refresh available components
- Choose "Spinner" from the list
- Configure properties: Set speed to 2.0, axis to 'Y'
- Save the project
Step 4: Test Your Custom Behavior
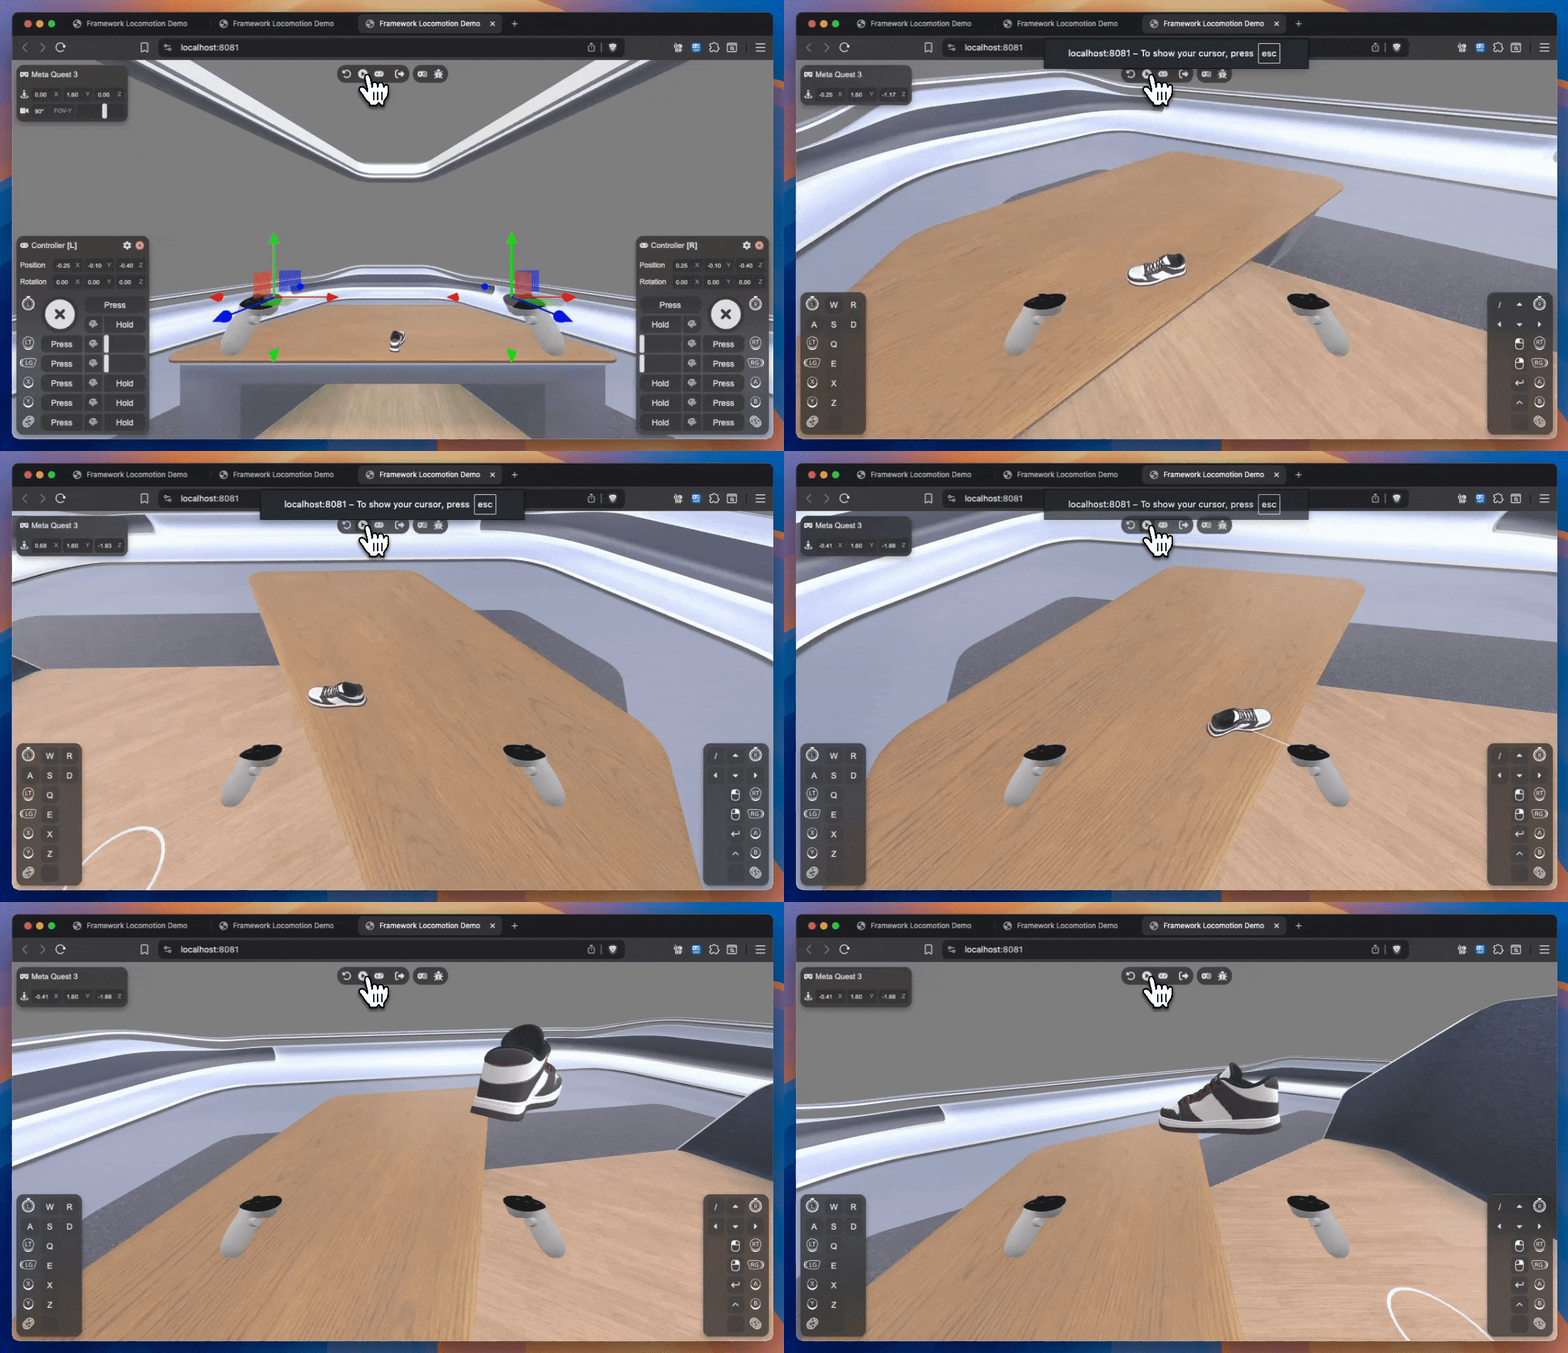
Check your app - the object should now be spinning according to your settings!
Advanced Integration: 2D UI Panels
Meta Spatial Editor can also handle spatial UI panels, integrating with IWSDK's UIKitML system.
Creating a UI Panel
- Create your UIKitML file in your project's
ui/directory (covered in Chapter 10) - In Meta Spatial Editor, click "Add 2D Panel" or use the menu: Nodes → New → 2D Panel
- Select the new Panel node in the Composition panel
- Position and size the panel in 3D space using transform gizmos
- In Properties panel, set the Panel ID to match your UIKitML filename
- Save the project
The 2D UI will automatically appear in your IWSDK app at the specified position and size.
Aspect Ratio Matching
If the panel's aspect ratio doesn't match your UIKitML definition, IWSDK will fit the content as best as possible and leave unused areas transparent.
Best Practices & Workflow Tips
Use the Right Tool for Each Task
- Use Meta Spatial Editor for: Spatial layout, asset placement, visual component assignment, lighting setup
- Use IWSDK code for: Game logic, dynamic behavior, performance optimization, API integration
Version Control Strategy
Track both your IWSDK project and your metaspatial project in source control.
Team Collaboration
- Designers/Artists: Work primarily in Meta Spatial Editor for layouts and visual composition
- Developers: Focus on IWSDK code for systems and behavior
- Both: Communicate about component interfaces and naming conventions
Best Practices & Tips
- Use the Editor for Layout, Not Logic: Keep business logic in code; use the editor for spatial layout and component assignment.
- Version Control: Track both your IWSDK project and your metaspatial project in source control.
- Collaborate: Designers can iterate on scenes without blocking developers, and vice versa.